Category Archives: General Use

There Can Only Be One… Calibration Point

Even though its the most memorable line from the movie “Highlander”, this statement has come up many times for assays where semi quantitation occurs in screening analysis.

One way to accomplish a rough estimate calculated amount is to use the ability to use a single calibration level for a compound.

When you do this there are two settings in the Method setting that can be used.

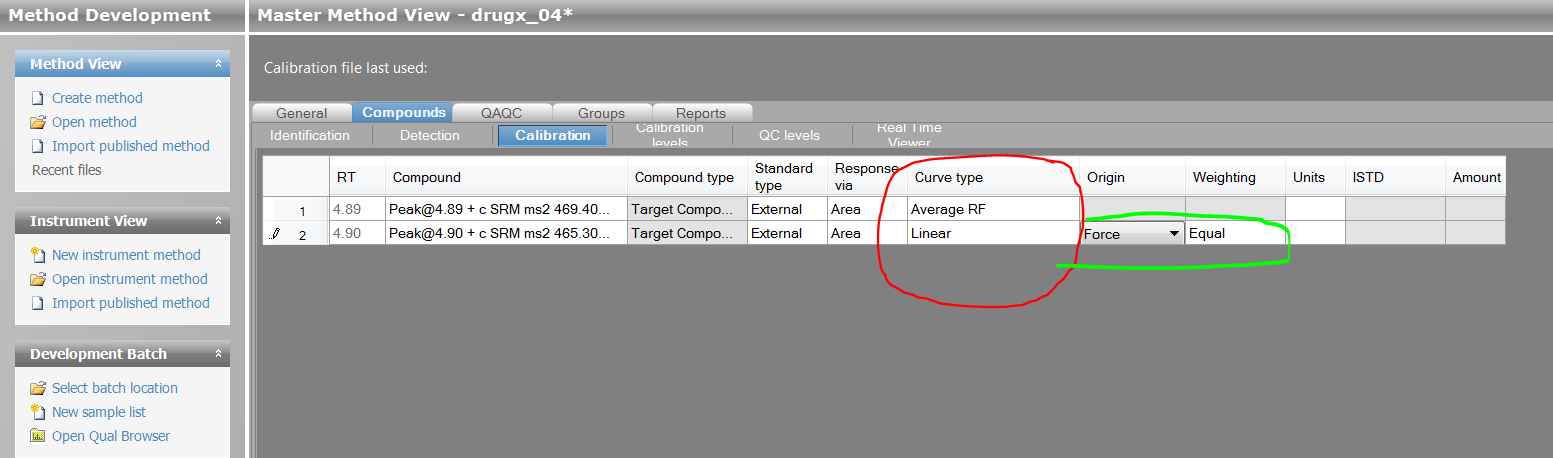
Selecting Average RF allows for the average response factor for a calibration curve to be calcualted. If you use cal one point

the response of the point will be compared to the response of the compound in the sample and a rough estimate based on the

average will estimate the calcualted amount.

If using a linear curve and one point, you MUST set the Origin setting to Force. This sets the origin at Zero and draw the curve

the response of the one calibration point. Thereby giving you a curve to estimate the calcualted amount from.

There is a third way using Internal Standards, but we’ll save that for another day.

Wizards and Batches… Removing the Warlock….

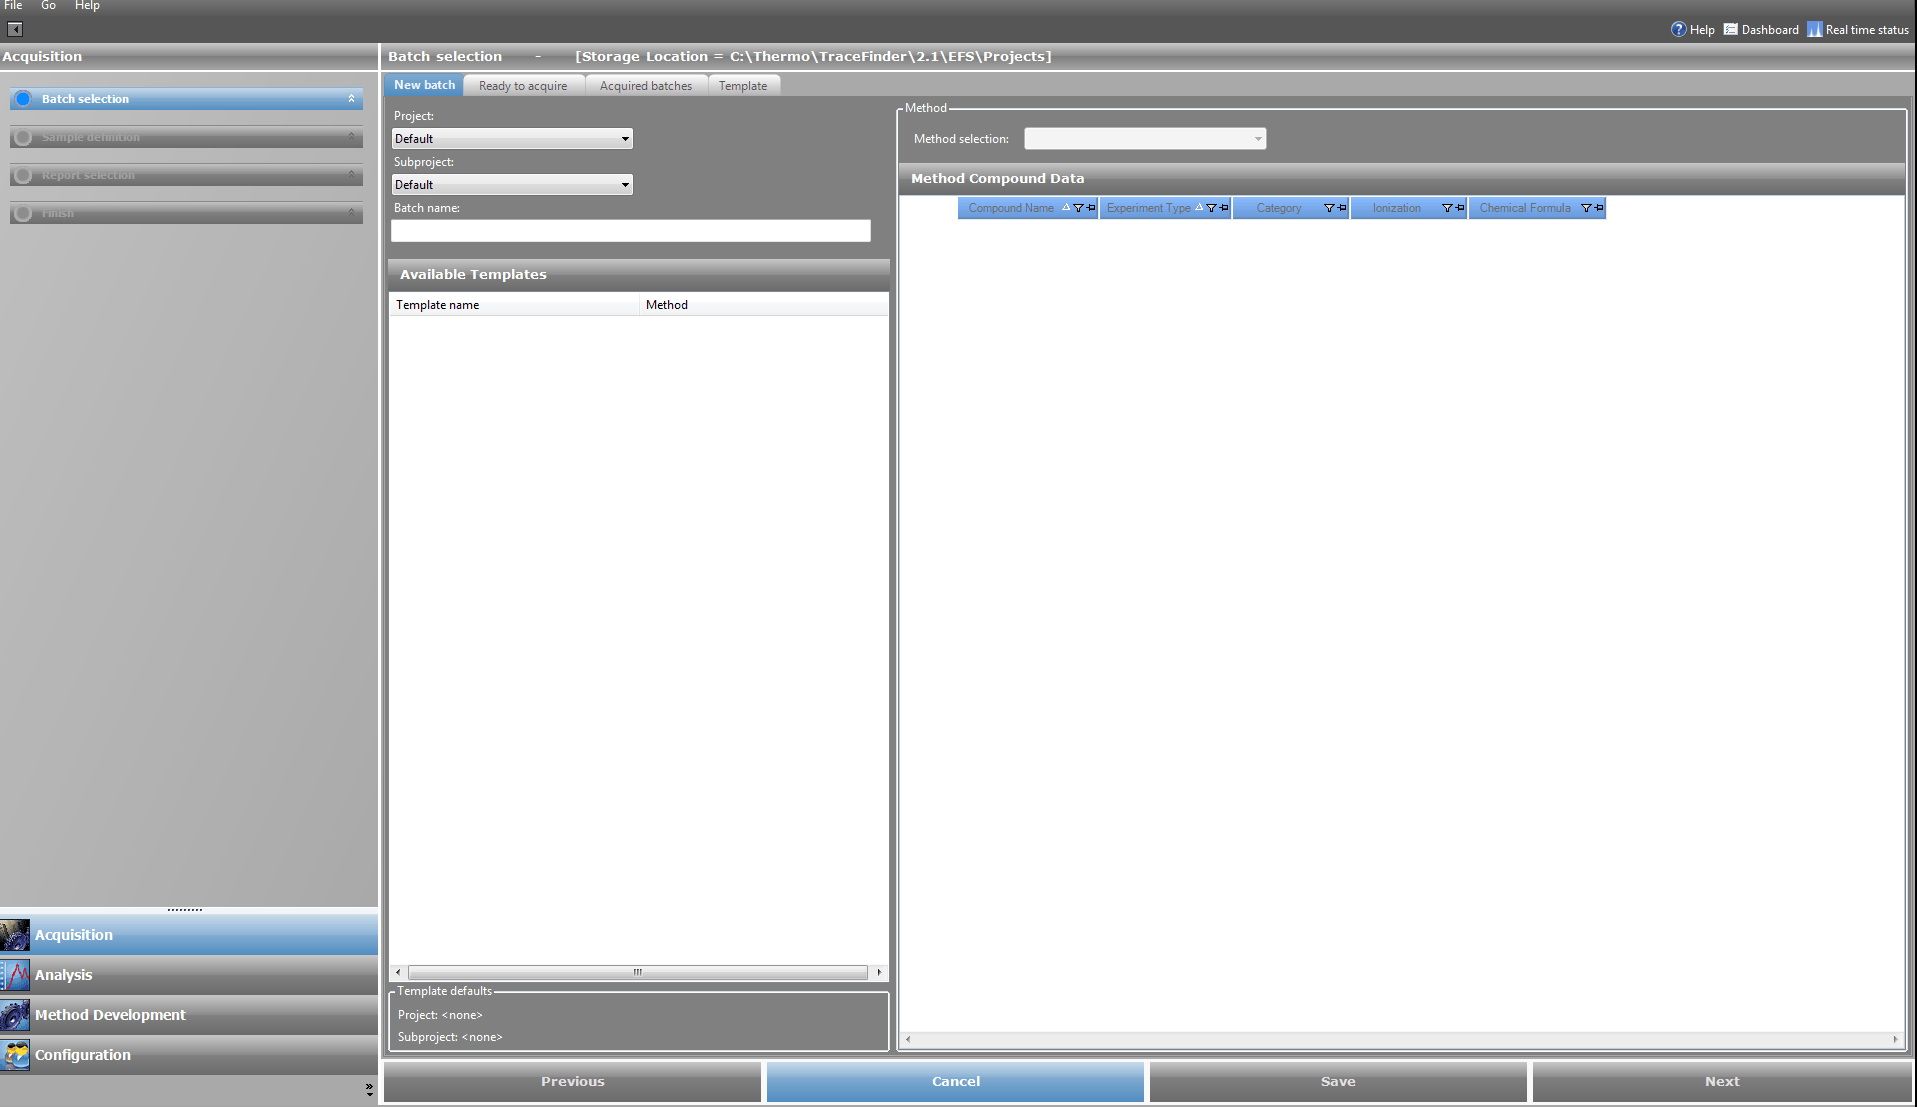
In TF there are three main choices to create batches. Each of these come from historical markets that TF is serving.

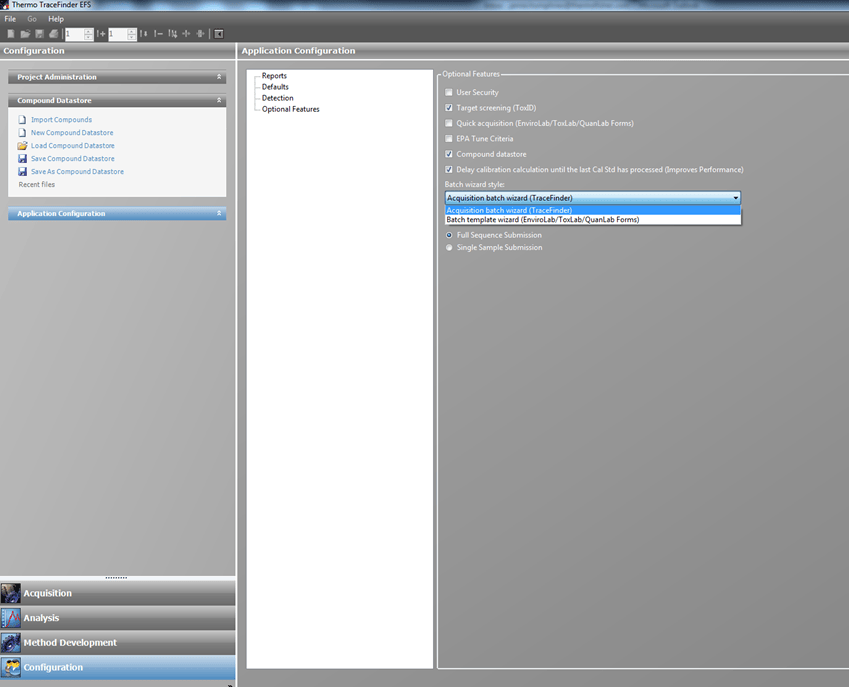
To start there is a selection of the type of creation you want to see. This is located in the Configuration mode under the Optional features section.

This allows the user to choose between the LabForms style wizard and the TraceFinder Acqustion Mode.

The TraceFinder Mode was made to make a wizard like workflow that naturally fit inside the application, and had a bit more intellegent checking of criteria before submitting a batch for Acqusition. This is the reason, that there are four mode buttons when it is enabled.

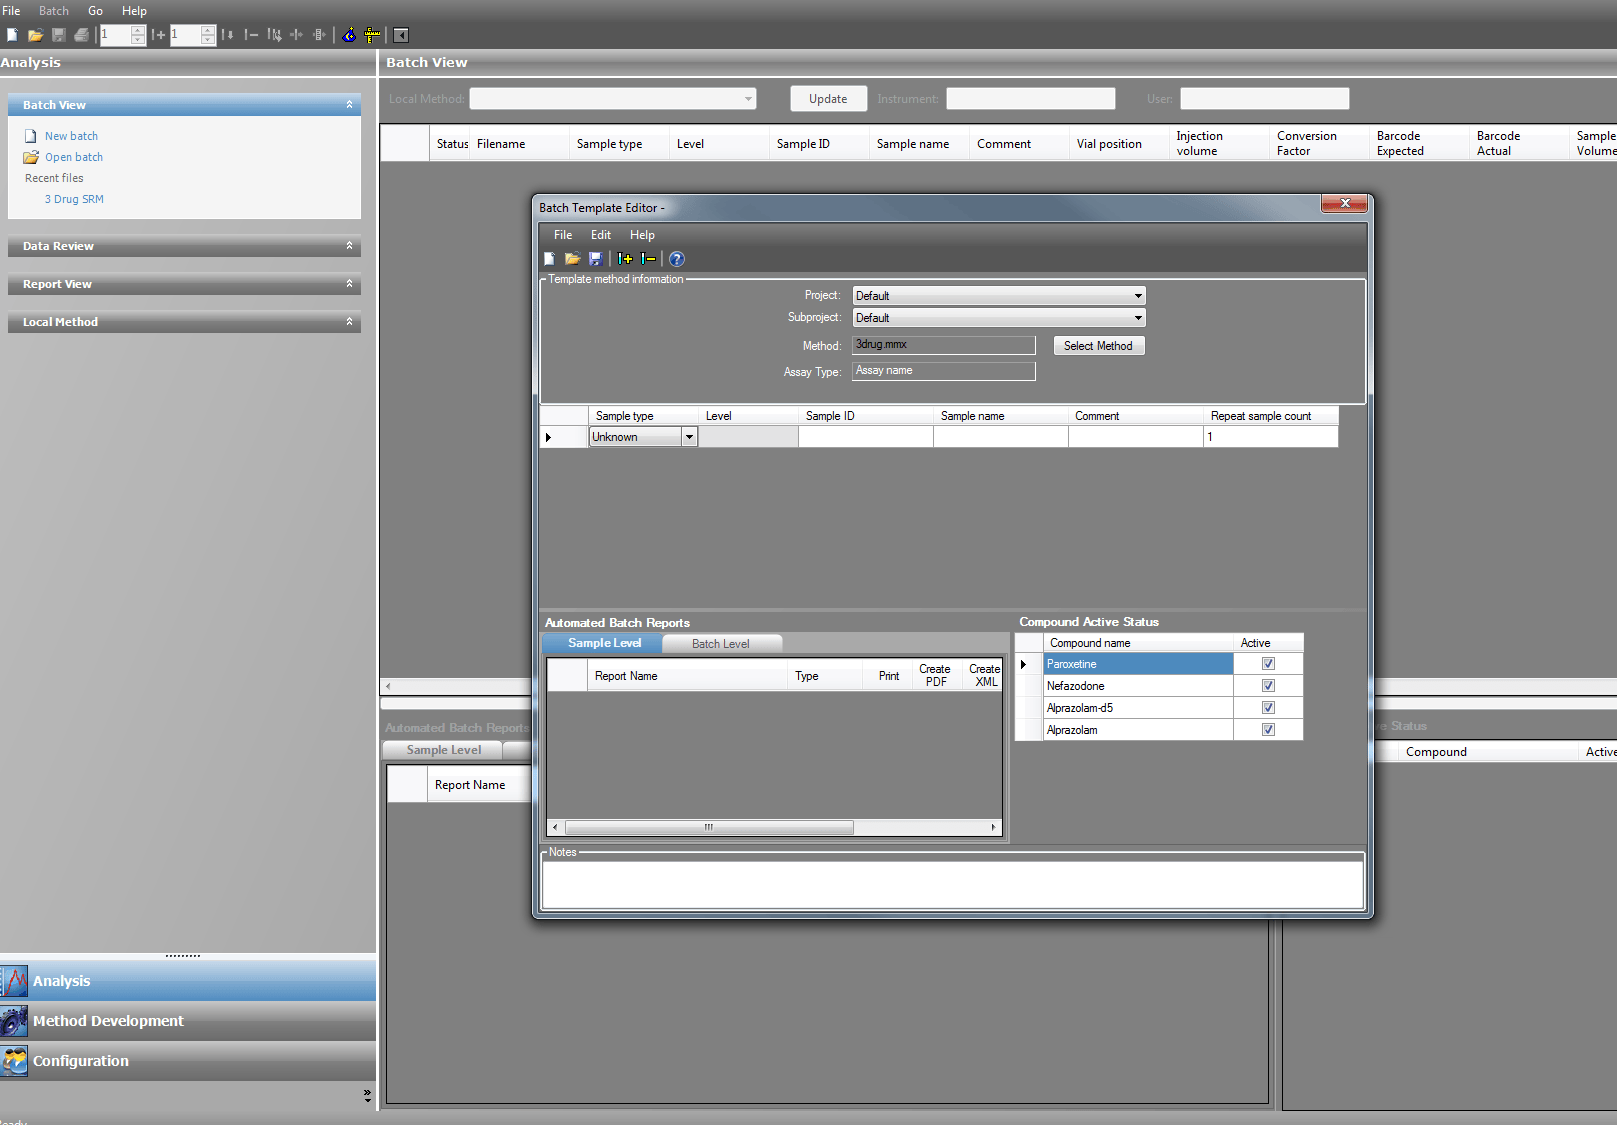
The Historical LabForms wizard was left in place to allow for users of that product to transition their existing workflow into the new application of TraceFinder.

Thereby, reducing the cost of the move. This view is more of a popup window and has some unique features. Eirther one allows for templates to be made and utilized in batch creation.

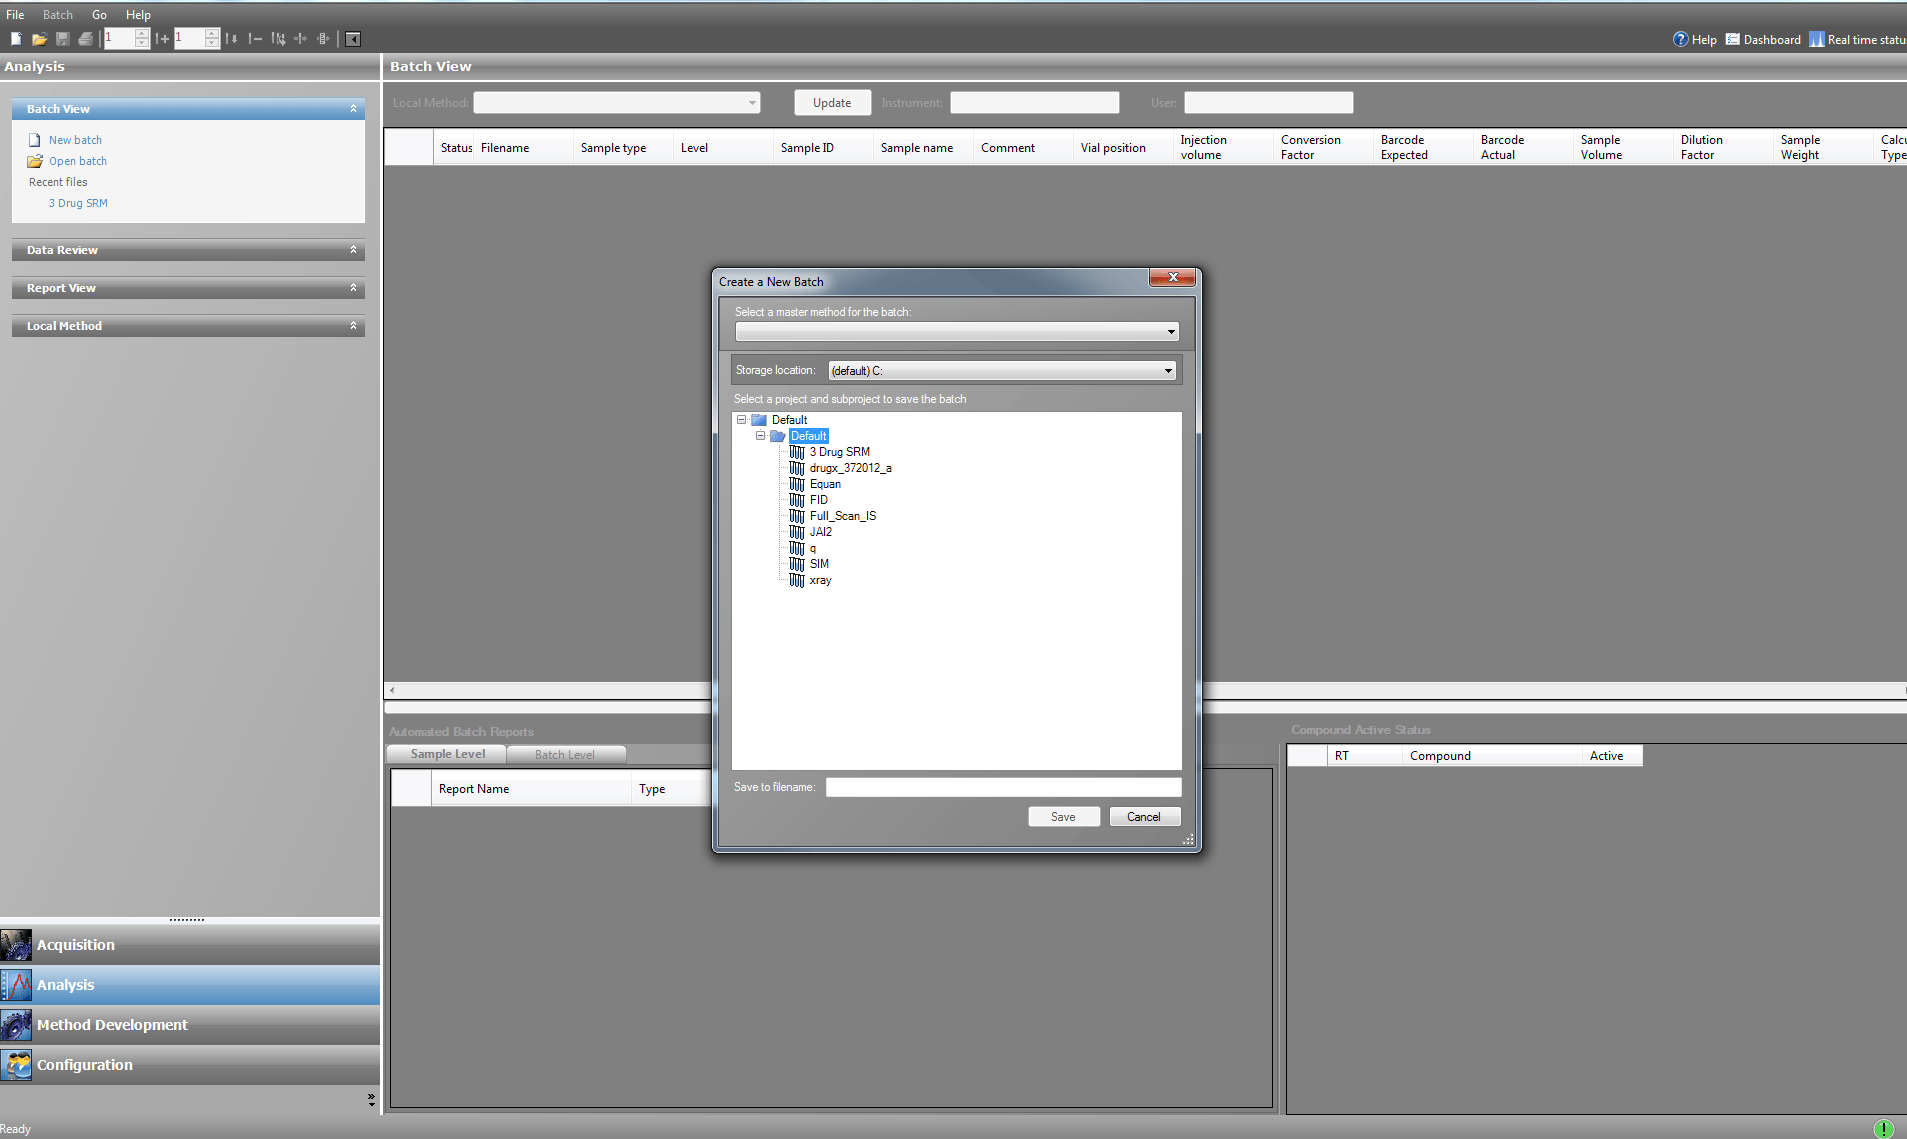
Finally Batches can just be made in a regular, non-templeted fashion by using the Batch View new batch selection.


Method General Setting Page – Hmmm.. I missed that setting

One thing that TF has as part of its DNA is to be flexible. Method development is a complex process and we are always looking at ways to reduce the effort, but to give flexibility in our approach.

One page that has alot of power, but is over looked many times is the General Setting Page.

These settings are the general setting for properties in the method.

These settings overide the default settings in the Application and apply to the Method and consiquently all the data that is processed with the method. These settings can be changed in at both the Master and Local Method levels.

Two points to look at.

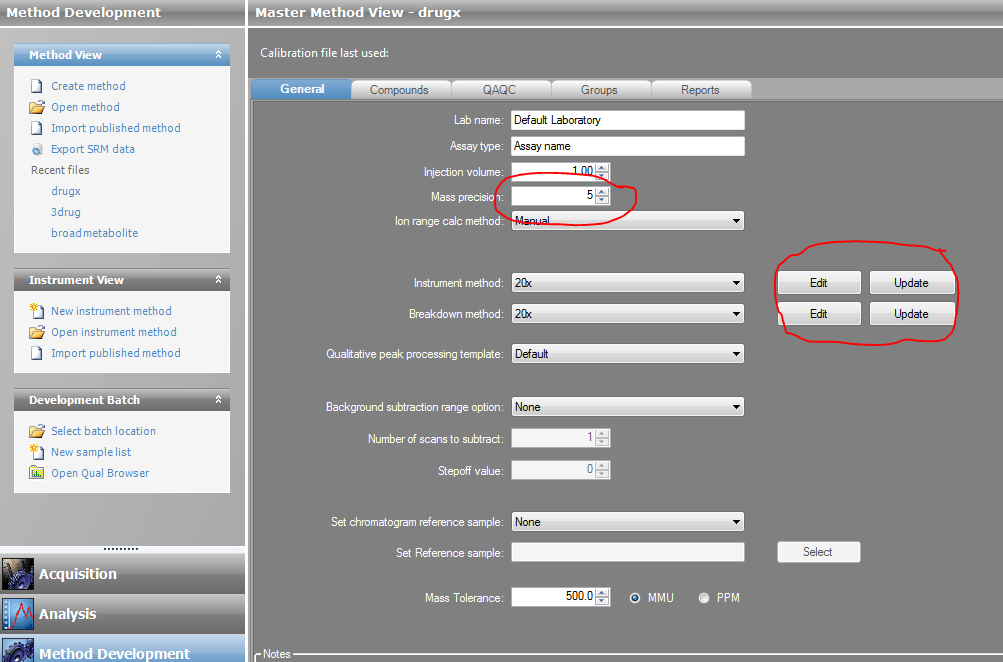
1) Mass precision – This applies to all the masses used in producing results. It does not apply to the reporting    properties of thethings like RT, or calcualted amounts.

2) Instrument Method Edit/Update – In the master method you have a copy of the selected instrument method, which the ultimate Master instrument method is located in the Xcaliber/Methods directory. When you select edit, you are editing the copy that is located in the Master Method folder. When you select update you are overwriting the changes you made in the Master Method Copy, to the ultimate Instrument Master method in the Xcaliber/Methods directory. When you use these button in the local method you edit the Local Method copy of the instrument method that was copied to the Local Method directory, and the update button copies those changes to the Master Method instrument method. This isolated the Ultimate Master instrument method from batch level changes that you may not want to be inherited by other Master Methods produced in the furture.

Now that I have a CDS, what do I do with it?

Well, the end game of the CDS is to supply information that can be used to create methods and acquire data.

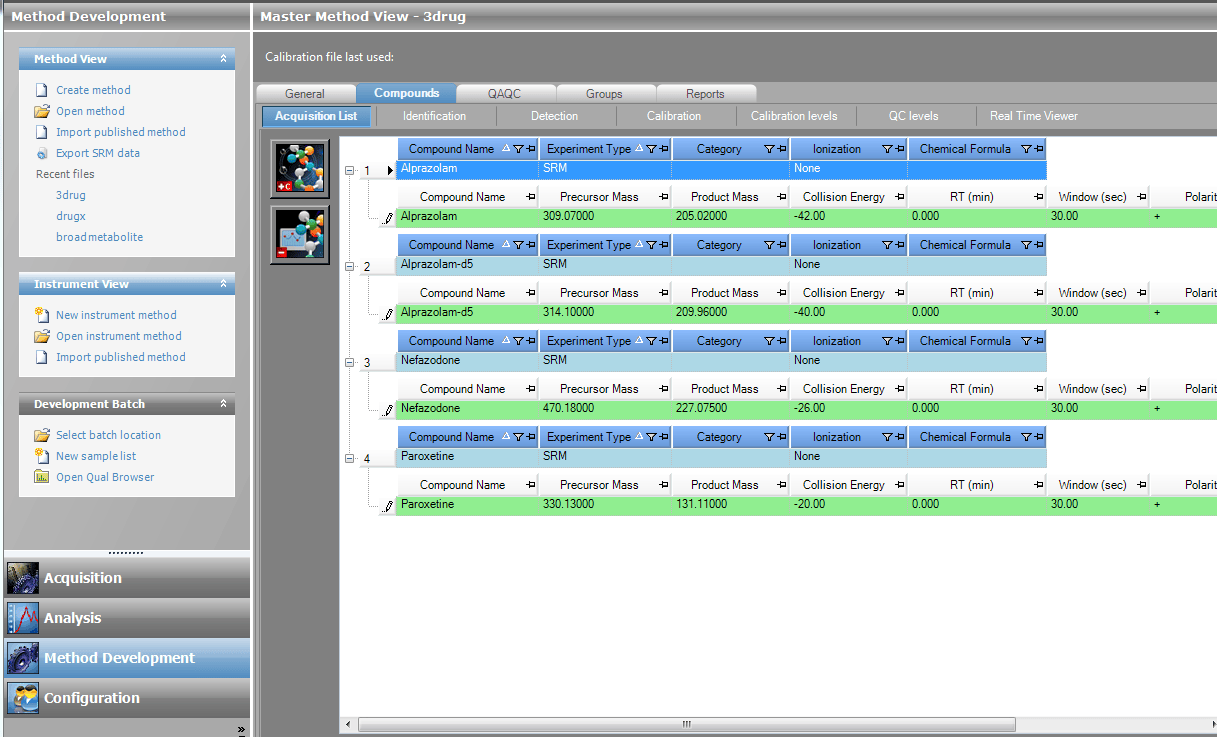
Here we’ll look at the Acquisition List side of the equation.


Here in the data we retrieved from a CDS or PMD file is stored.

Note that PMD files do not contain all instrument information but this can be added to a CDS and then adjusted.

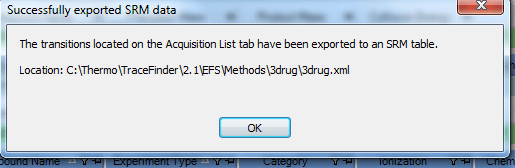
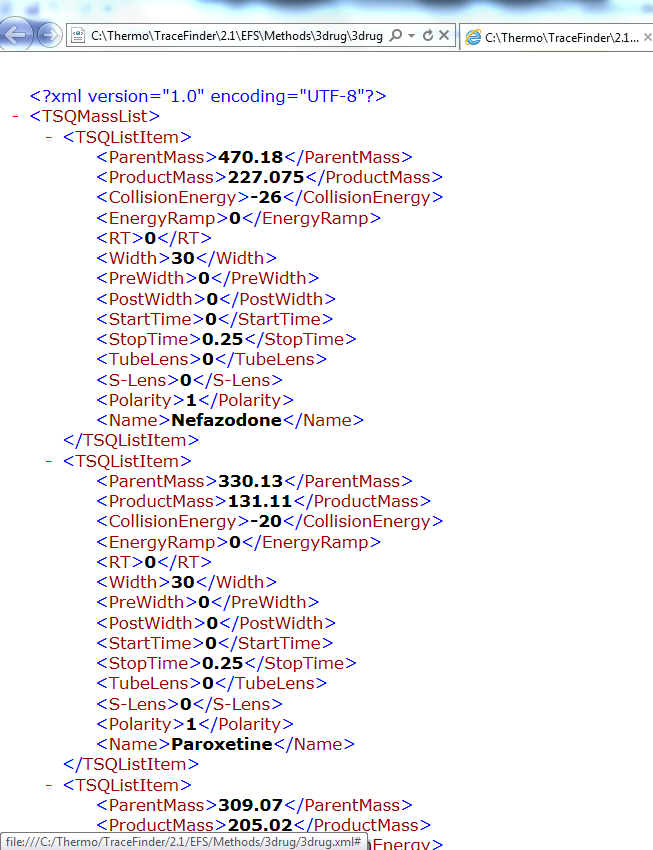
From here you can select the export SRM data in the Method View tab and an Xml file containing the instrument specific data will be produced.


If you open this file in a text editor such as note pad it will contain the information in the Acquisition List in a format that can be imported into the Instrument Method editor.


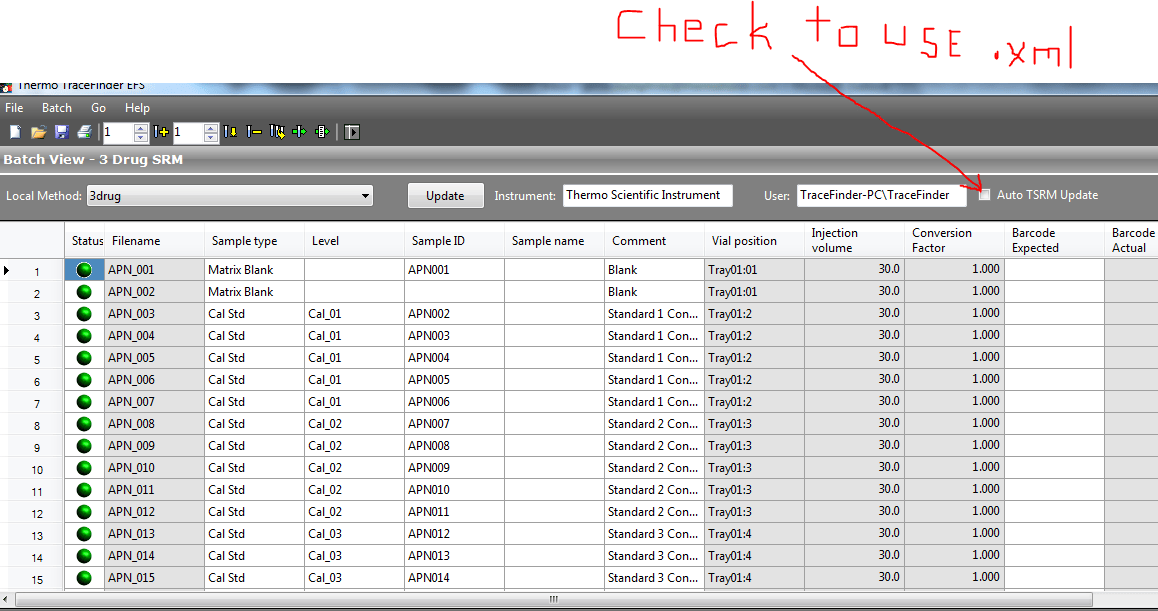
If on the Batch View section or the final page of the Acquisition Mode wizard you select Auto-TSRM update this information is passed to the mass spec at the time of acquisition. This allows the user to collect only the data needed to be processed and allows for manual updates in the batch to be automatically loaded to the mass spec at run time. This does not monitor the RT of peaks and automatically update the mass spec controller, but allows for user input to occur in on place versus having to open the instrument editor for a second adjustment.

The World Of TraceFinder – Please Leave A Commit or Suggestion

For all those new to the blog.

Please let us know what is helpful, not so helpful or what you would like to see.

This is a conversation portal so we can get your direct feedback and ideas.

Please sign up to follow the blog via email.

On a side note: If you would like to demo TraceFinder and not have it installed on your computer, we can provide you with a link to a Cloud installation for a few days to tak it for a spin. This allows you to use TF through a web browser and use our canned demo data. If this is of interest, please fill out the “Ask A Guru” form and request Cloud Access.

Thanks

Jamie Humphries, Product Manager

Jamie.Humphries@thermofisher.com

Using the Compound Data Store – Variant on a Theme

The CDS once created can be used to create methods in a more simplified way.

Again the CDS is a way to use knowledge you have previously collected about a compound and it analytical conditions.

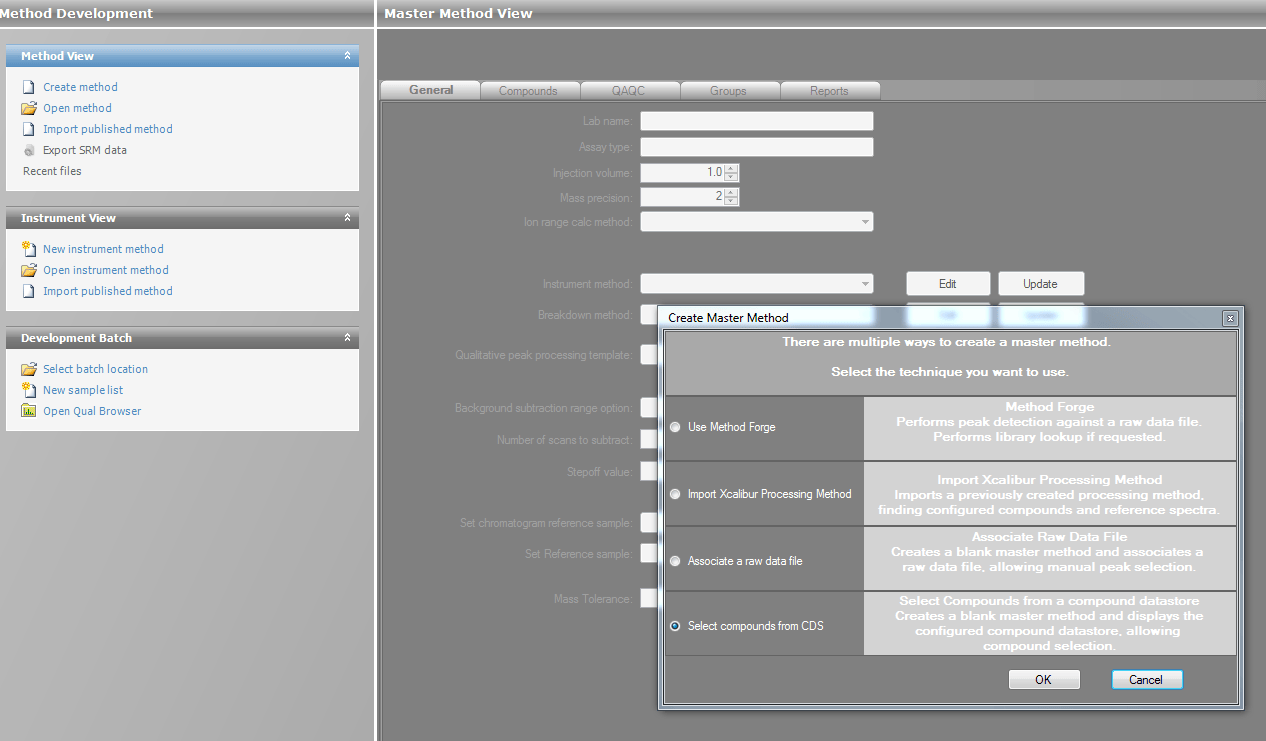
First in the Method Development section select “Create new method” from the Method view subsection.
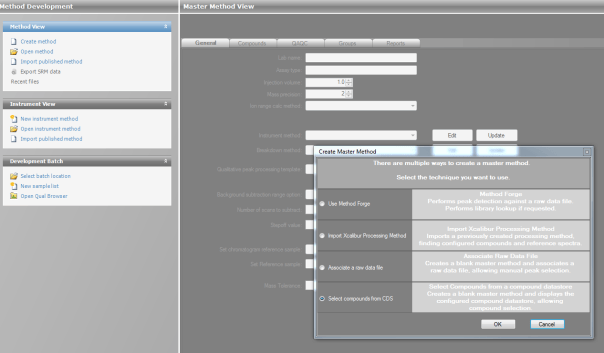
Here you can see the select compounds from CDS is enabled.

One thing to note down: only one CDS can be open at one time in TF 2.1, which ever CDs is loaded in memory in the Configuration section is the one used. If you want to use a different CDS, load that one into memory inthe Configuration section.

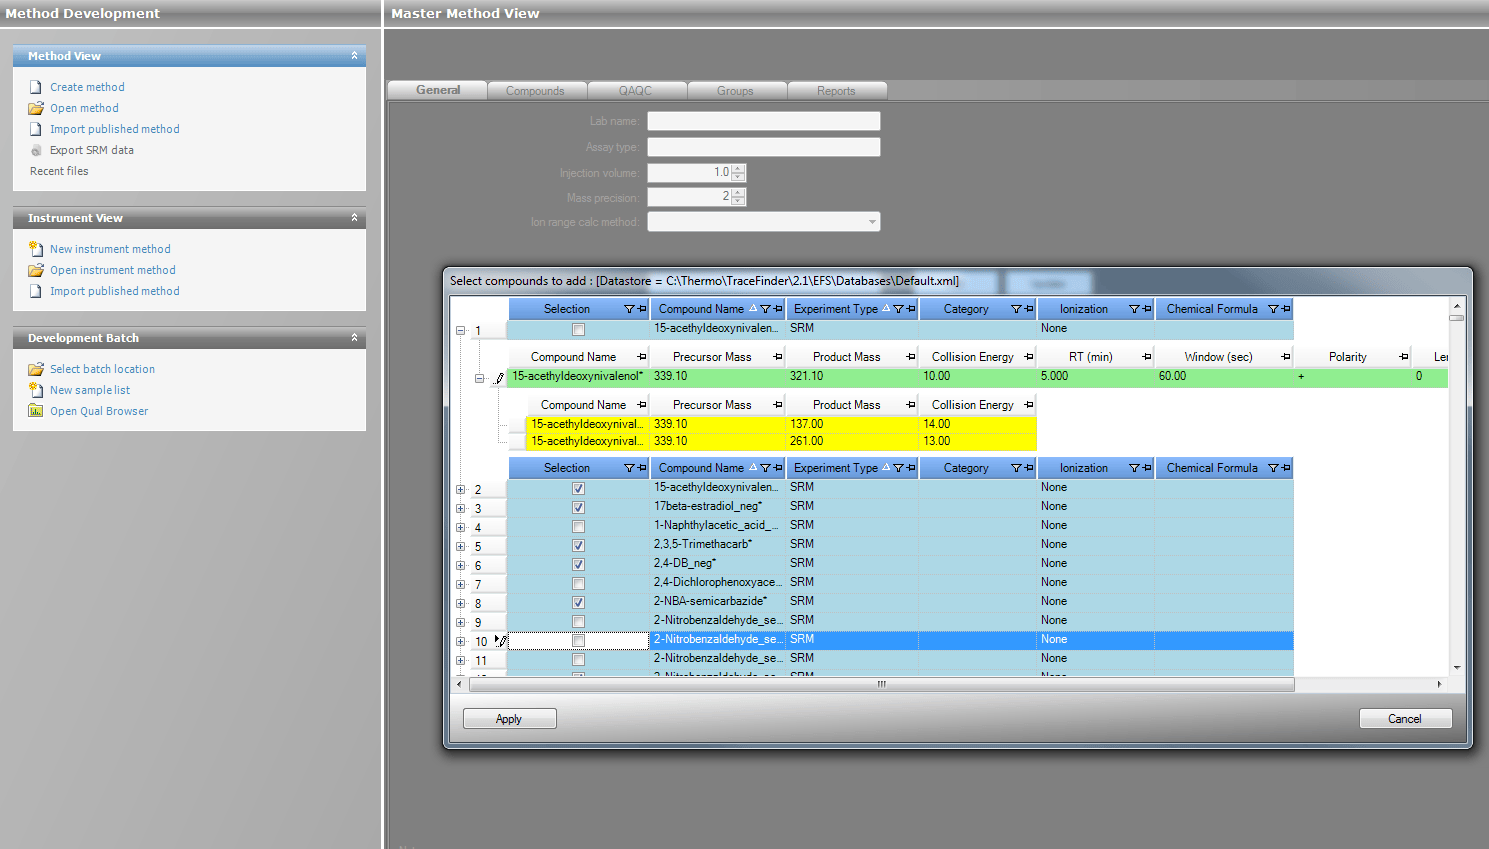
Next you can select compound from the CDS to be used in a new Master Method.
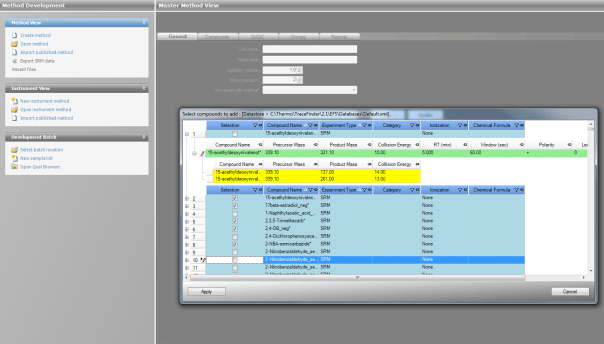
You have the choice to select all, highlight a few and deselect them or pick and choose. Once you have made your selections click the “Apply”button.

This will create a new Master Method.
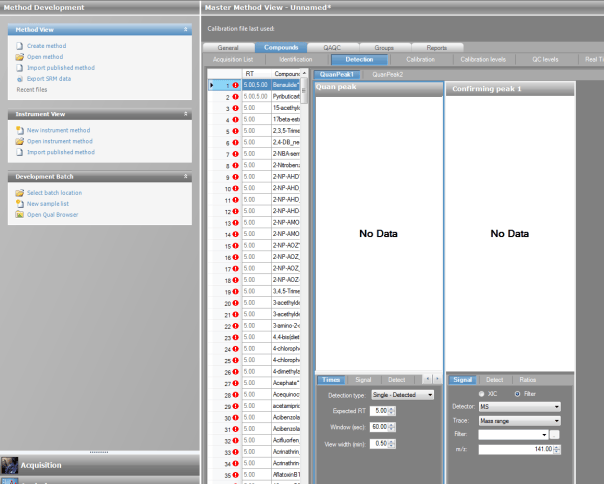
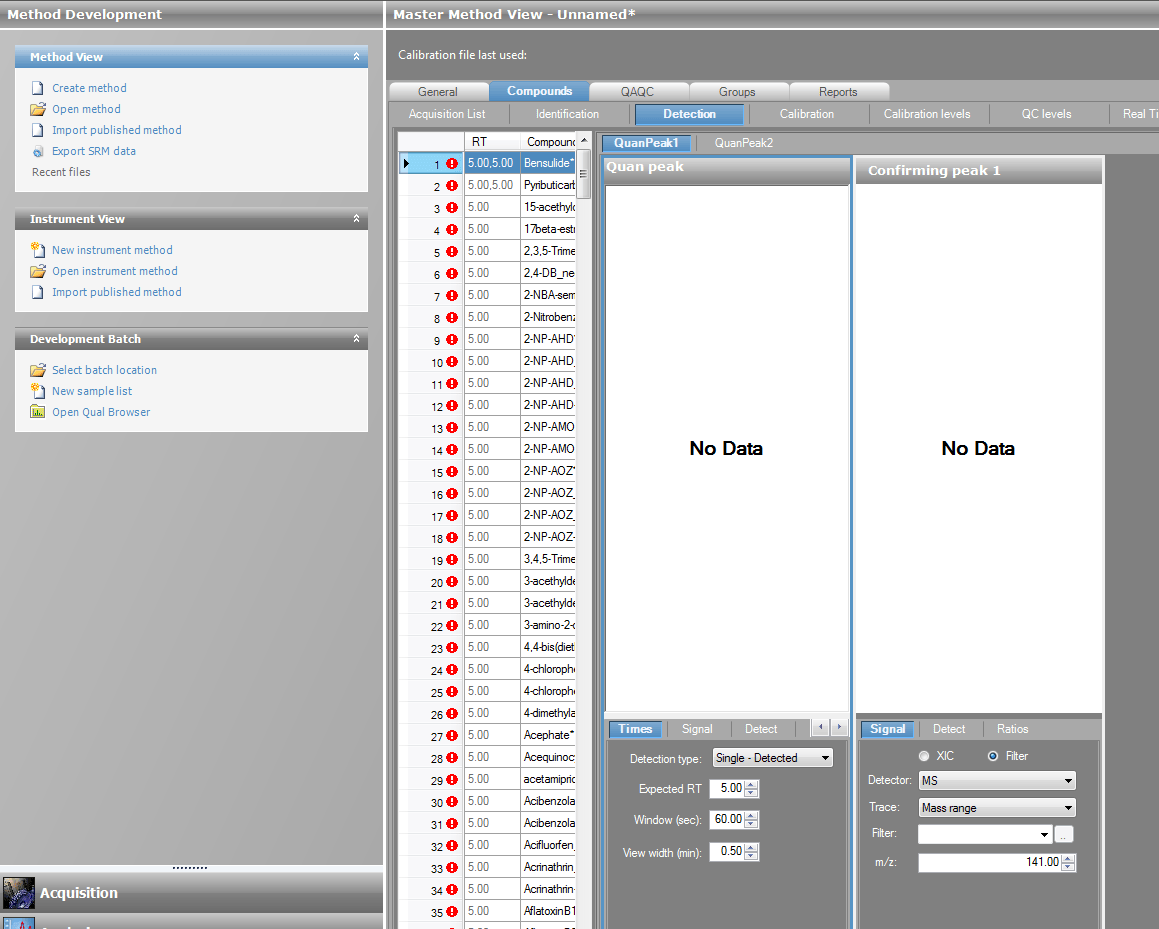
Once created you will need to save it witha new name. The data ported over consist of acquistion related feilds in the Acqusition List section, which we will discuss later this week, and compound processing basic data (ie. compound name, retention time, detection window, etc..) At this time you will notice the little red balls next to the row number. If you scroll over this it will tell you that the compound does not have a filter string assigned.

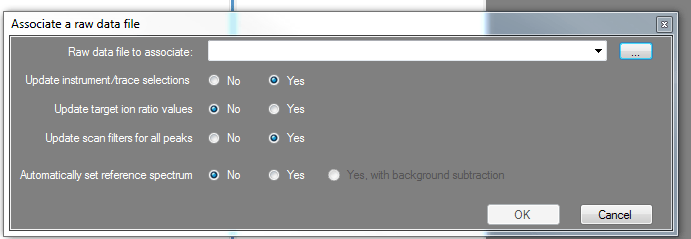
This is important because at Thermo we need a filter string assignment to tease the data about the peak out of the RAWFILE. From the Master Method file menu item select “Associate new raw data file”
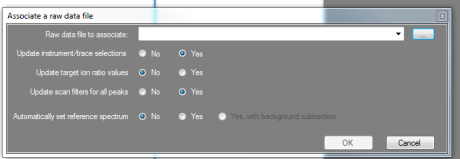
By selecting a file, that has data for the compounds you previously selected fromthe CDS, and enabling the “Update scan filters for all peaks” button; TF will use the data in the Acqusition list to automatically update the filter selection box for each peak.

Any conflicts and the red ball will remain, to let you know that you must manually select a filter for that peak. This is where the SRM, XIC and SIM experiment type come into play. It specifies which type of filter to select from as in each method you can have blended experiment types.

Tune in next time for “AUTO-SRM UPDATE”
Compound Data Store or Compound Database – Kinda the same thing….

TF has the concept of bring in a data you know about compounds and storing it for later use.

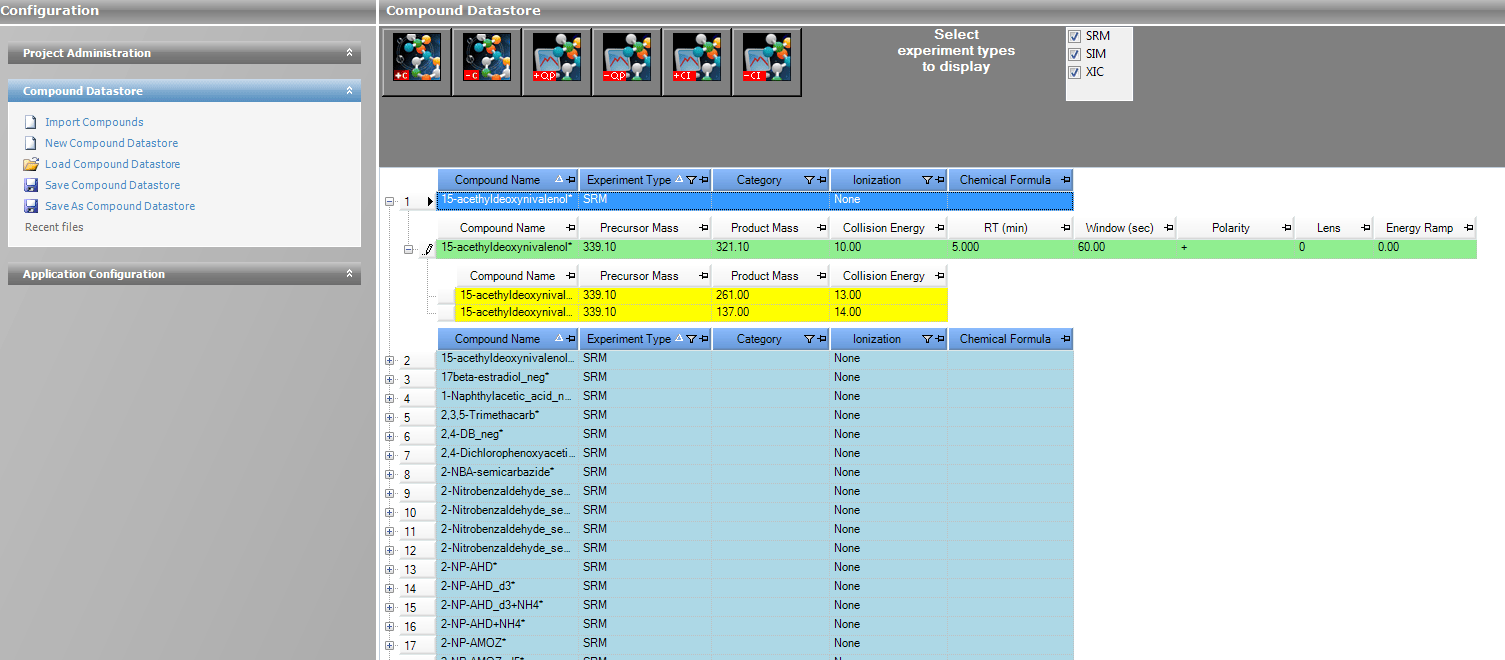
This we call the Compound Data Store (CDS), but what’s in a name… Its a an XML file that contains information about the compound.

The picture above shows this data in excel. It contains information like the compound name, experiment type, collicion energy, retention time, fragments relationships.

Attached here is a copy of the csv template TEMPLATE.

This information can be edited in excel and uploaded into TF to add to a database or to alter the data base. The changes will be reflected in the TF CDS module.

Once the data is in the CDS, a method developer can utilize it to create processing methods which in turn can be used in syncing acquistion methods in the Master Method.

A blog post to come later this week will highlight the use of the information in the Auto-SRM feature.

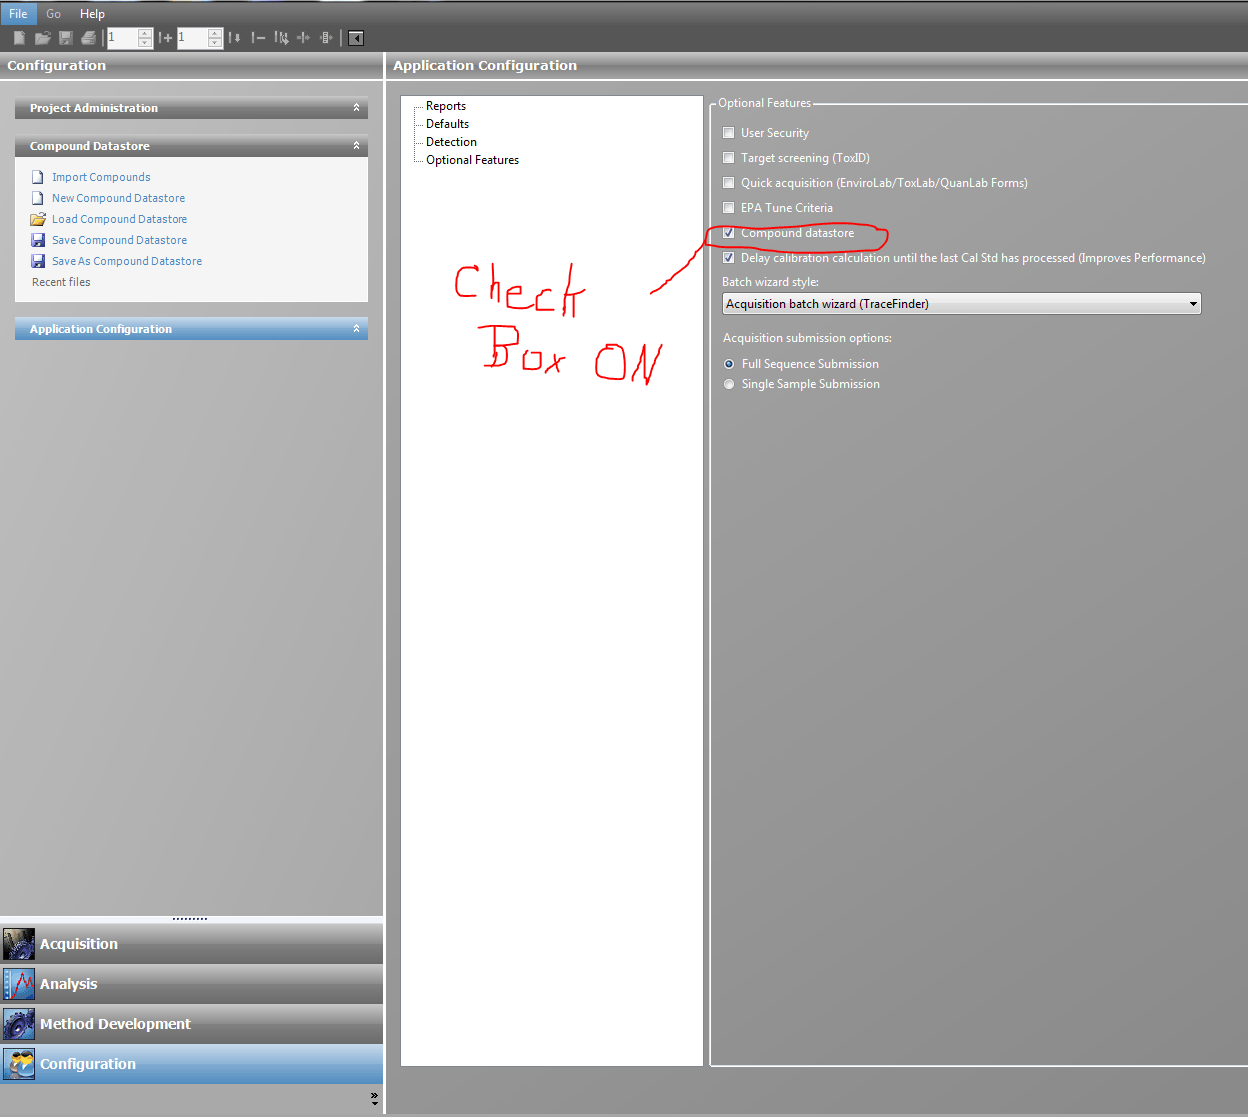
A quick note is that the CDS is not automatically turned on at installation.

The user will have to configure the option and restart TF to take advantage of this feature.


“Got Data?” – New Version on the way – TF 2.1

We are glad to announce that TraceFinder 2.1 is being cut to disks this week and will be on the shelves shortly.

The version has many “bug” fixes and performance improvements, but the BIGGEST feature is the ability to be run  on any detector Thermo supports. So if yo have a QExactive or a FID standalone GC, its supported. As well as, blended configurations.

So “Got Data?” we have a tool for you.

Plus soon to be published iBook for getting started with TF. “The Guru Guide”, written by the product manager for TraceFinder.

Remember if you have a question please fill out the form on the “Ask A Guru” tab. That message goes directly to the product manager or one of the support staff.

Custom Reports Suddenly Stop Working????? Here’s a reason and a Fix!!!!

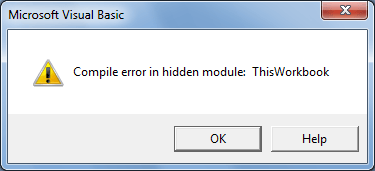
If you (suddenly) get an error like the following (which may vary depending on OS) when generating custom reports, it is likely caused by a recent security update for MS Office.


Good news is that Microsoft realized this problem and provided a “fix it” tool at http://support.microsoft.com/kb/2703186.


This is what happens based on my investigation if you care:


There is an EXD file created for some VB 6.0 runtime files when you use the controls provided by the runtime files in the Visual Basic designer. Those files are located in %APPDATA%\Microsoft\Forms\ folder (which may vary depending on OS). The problem is that, when security update installs new versions of certain runtime files, the EXD files become invalid and hence this error occurs.


To fix the error, you need to delete the EXD files and they will be re-created as needed. To delete those files, you can either use Microsoft provided “fix it” tool from the link above, or go to the folder directly and delete them.


This link http://technet.microsoft.com/en-us/security/bulletin/ms12-027 gives you some details why the security update is necessary and which software are affected.


Stop Bouncing Around When Reviewing Data

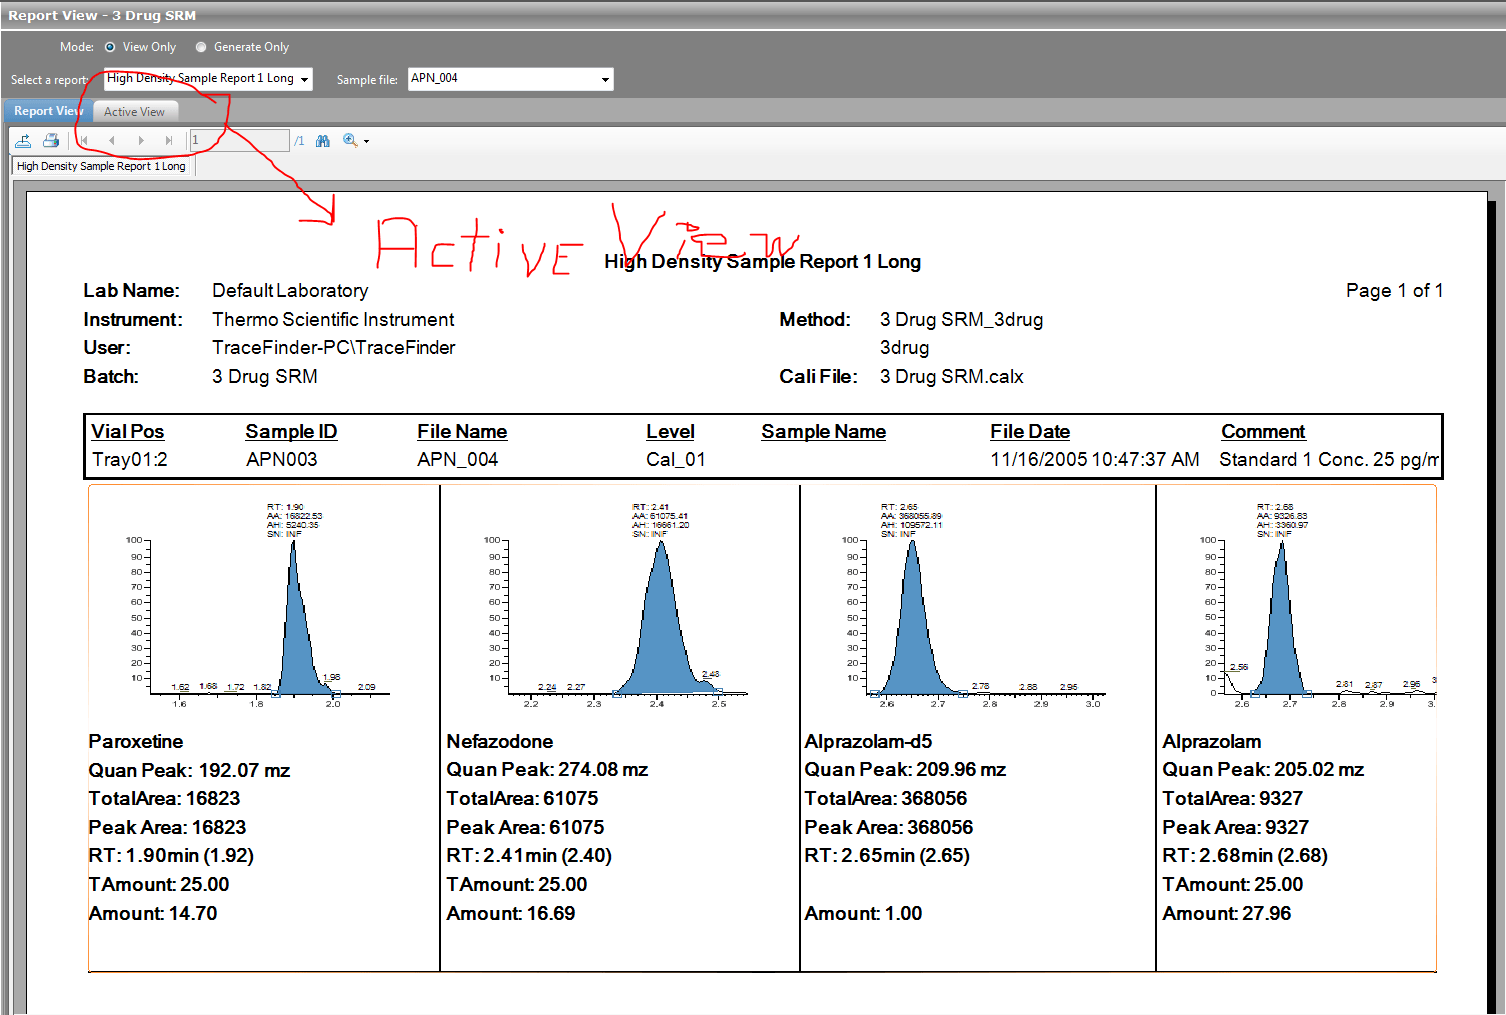
In Tracefinder you have the ability to review your data in the form of you final report in Report View.

By selecting the report you want to see and the data you want see it from, as long as its a Standard Report shipped with TraceFinder, you can see a preview of the report without actually creating the pdf or paper.

This is a virtual report help in memory while you review it. It allows the user to see the end result but still be able to make some changes.


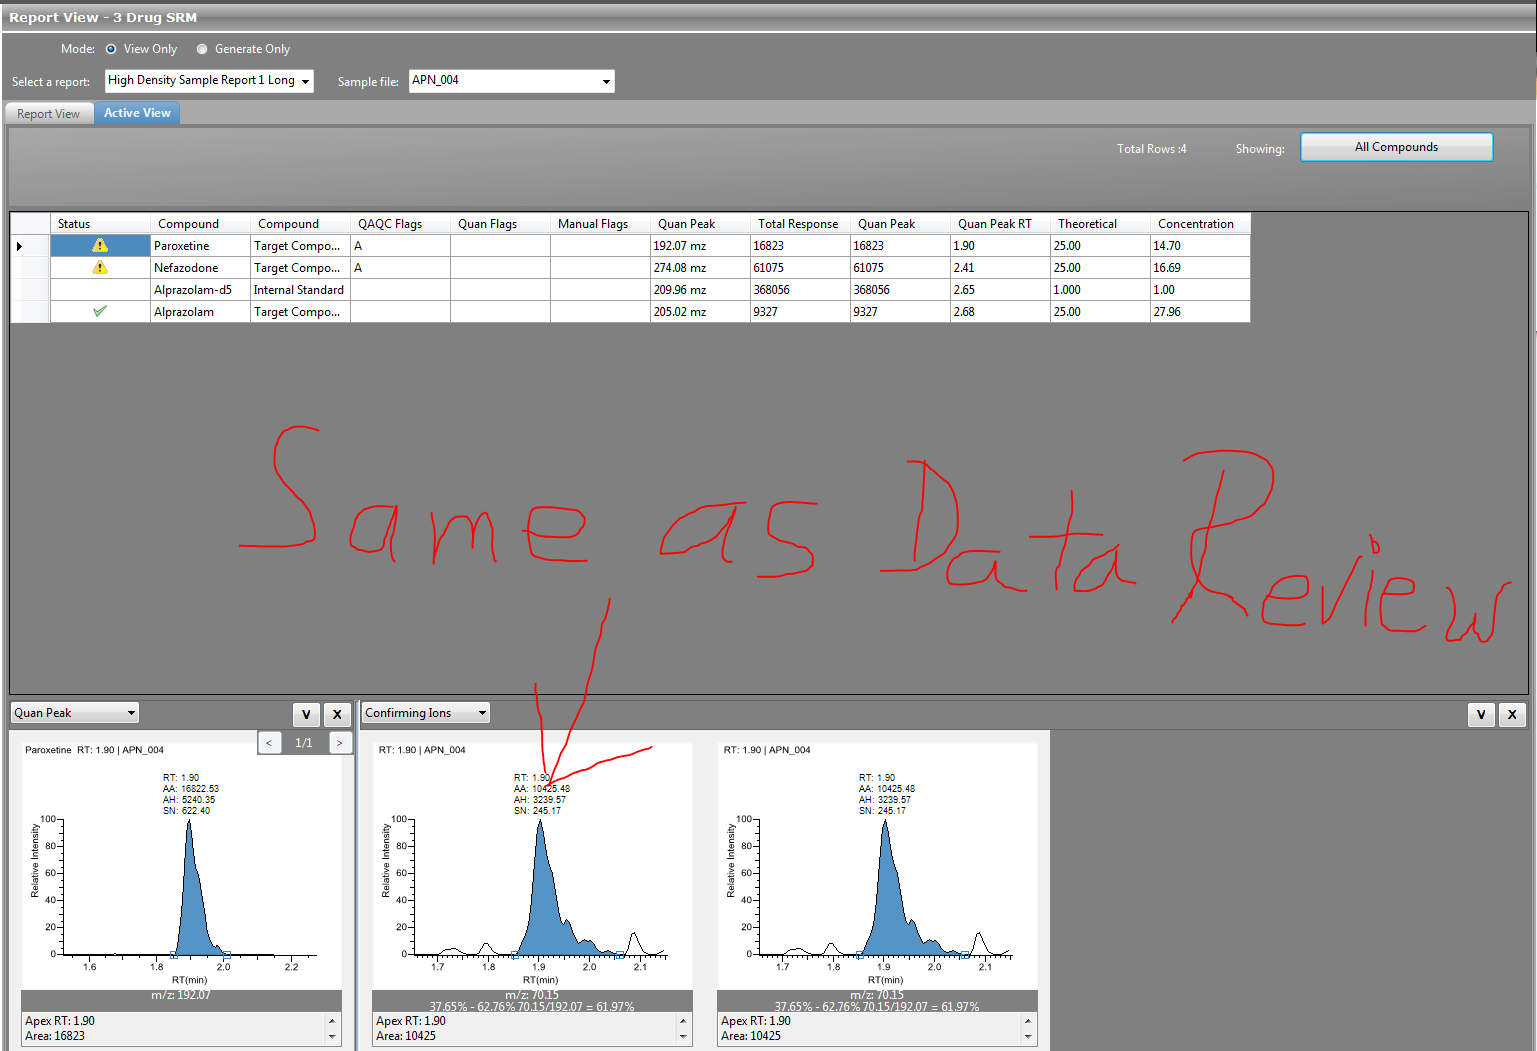
A feature of many of the Standard reports that are sample centric is the Active View tab.

This tab allows the user to stay in the reporting area and make data review type changes. It will display the results found in the text of the report, but give you the ability to perform chromatographic editing just like in Data Review. Once all the changes are made then simply press an Update Report button that will appear above the virtual reports and the data on the report will be updated and the results in the Data Review Screen will be too.

This keeps you from clicking around from Report View and Data Review.